
Follow this Tui Pinafore ruffle hack to create your own adorable shoulder ruffles using the existing pattern strap pieces!
Thank you to Hannah Wilbiks for creating this tutorial for our Below The Kōwhai community.
To see more of Hannah’s beautiful sewing and totally cute kids you can follow her on Instagram at @sewlahteadough

Prepare
Grab your copy of the Tui Pinafore from our pattern collection, available in your choice of PDF download or paper pattern.
First you must decide on the length and style of the ruffle. There are two main options for each:
Long or Medium ruffle length.
Double sided or single sided ruffle.
See the details below to help you decide, as this will inform how long you cut the pattern piece and how many pieces you cut.
RUFFLE LENGTH:
Long: Ruffle begins at the bottom of the bodice and goes around the length of the shoulders and tapers back down to the elastic waist band at the back.
Use the Tui strap pattern piece on the fold to get double the length for the ruffle rectangle.
Short (as shown in this tutorial): Ruffle begins half way up the front bodice, goes around the length of the shoulders and tapers back down to the elastic waist band at the back.
Use the Tui strap pattern piece on the fold to get double the length for the ruffle rectangle, remove a few inches from the cut end to make it slightly shorter than double.
RUFFLE STYLE:
Double sided, lined ruffle with enclosed seams (as shown in this tutorial):
Cut two mirrored ruffle pieces from your fabric per strap – four
pieces in total (you could choose the outer fabric to match your
straps, or perhaps the same outer, and a contrasting lining).
Single sided, unlined ruffle with narrow hem:
Cut one mirrored ruffle piece from your fabric – two pieces in total. You will sew a narrow hem for this option.
Create Ruffle
Step 1.
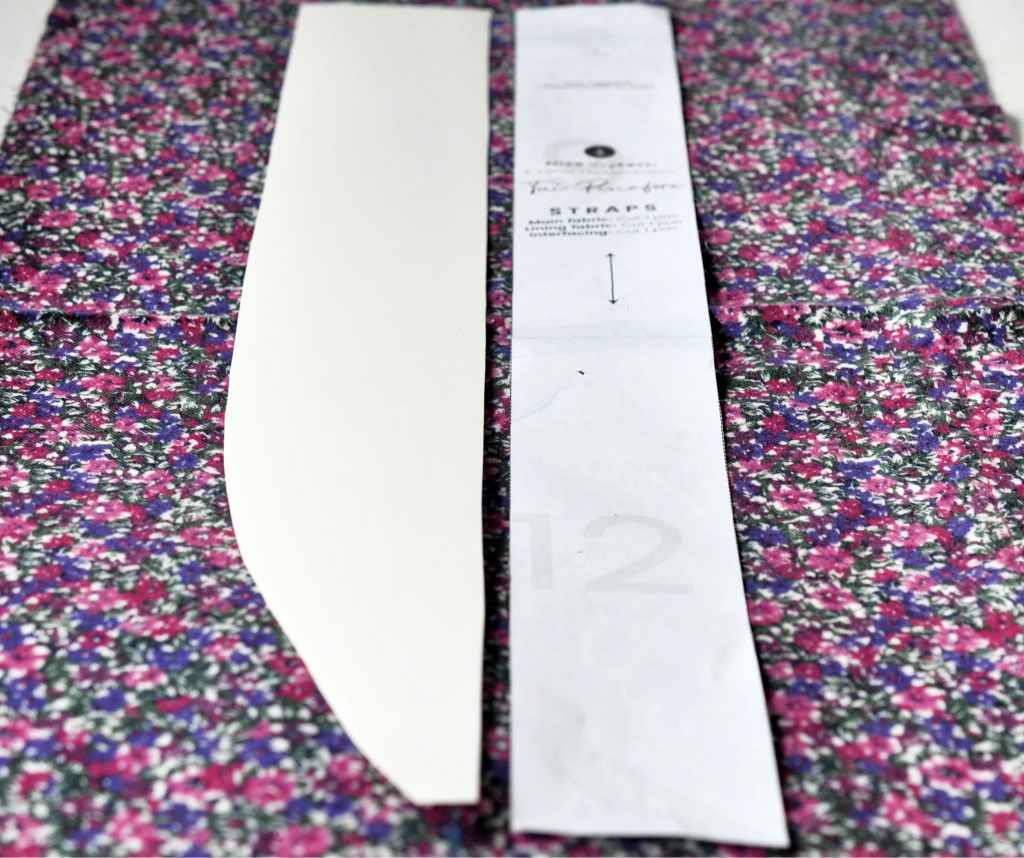
Using a blank piece of paper or sewer’s tracing paper, copy the outline of a strap piece onto this paper.
Use the Ruffle Length and style options above to determine how long your ruffle piece will be and how many you will cut.
Taper the ruffle edges:
Begin at the end corner of the rectangle and draw a curve starting gradually until you get to the width you desire for the ruffle. A good width to start with is the same as the strap itself. Or, go bigger and curve out past the strap pattern piece guideline for a wider ruffle.
Add a 10mm (3/8″) seam allowance.
Step 2.
Unlined narrow hem ruffle:
Press 5mm (¼”) to the wrong side, along the curved edge of the ruffle piece. Press under another 5mm (¼”), topstitch this narrow hem.
Skip to step 5 to continue.
Double sided lined ruffles:
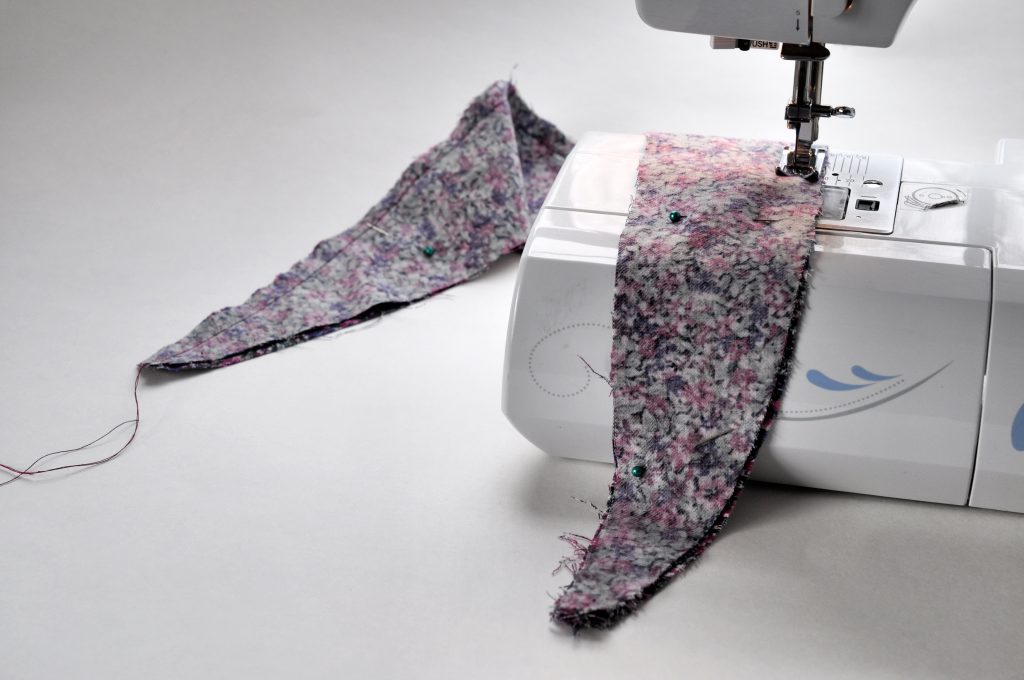
Place the pairs of ruffles right sides together.
Sew along the curved edge with a 10mm (3/8”) seam allowance.

Step 3.
Trim the seam allowance and turn right sides out.

Step 4.
Press well.
Topstitch the curved edge (optional).

The remaining tutorial steps are the same for both types of ruffle
Gather
Step 5.
Sew two lines of gather stitching (straight stitch, with longest stitch length) along the straight, un-sewn edge of the ruffle. Start and stop at each end, 5mm (1/4”) and 15mm (5/8”) from the edge.
Leave the thread tails long.
Step 6.
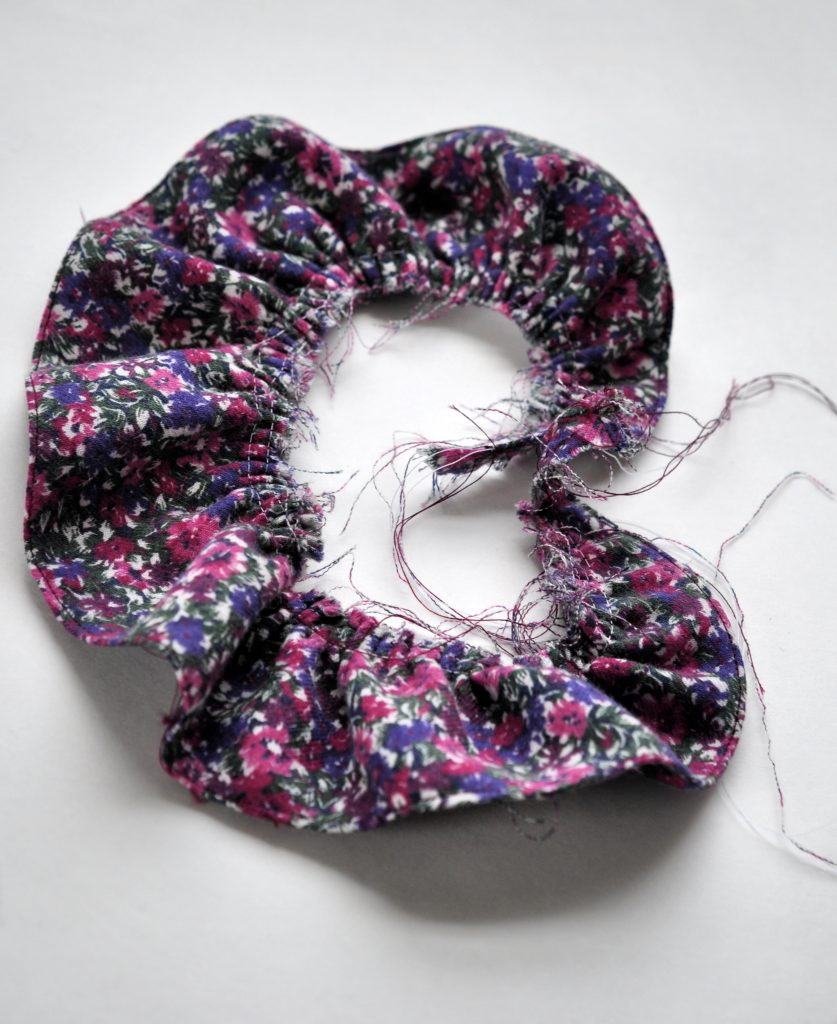
Pull gently on the bobbin threads (underside thread).
Gather the ruffle from both ends into the middle.
Distribute gathers evenly.
Step 7.
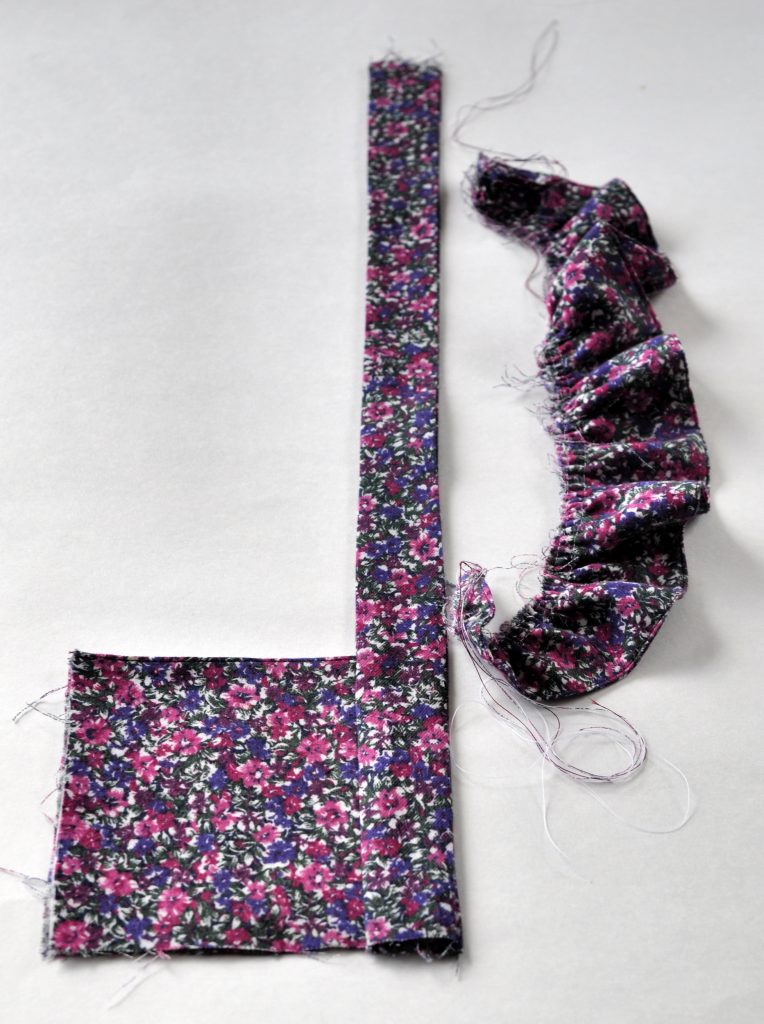
Complete up to step 6 of the Tui Pinafore tutorial.
Lay the ruffles alongside the straps and adjust as necessary, laying it in the placement you would like for the ruffles.
You may wish to baste (a temporary stitch to hold fabric in place, using your longest stitch length) the ruffle to the strap piece before you pin the layers together, to ensure that you don’t miss catching both sides of the strap as you sew it together.
Attach Ruffle
Step 8.
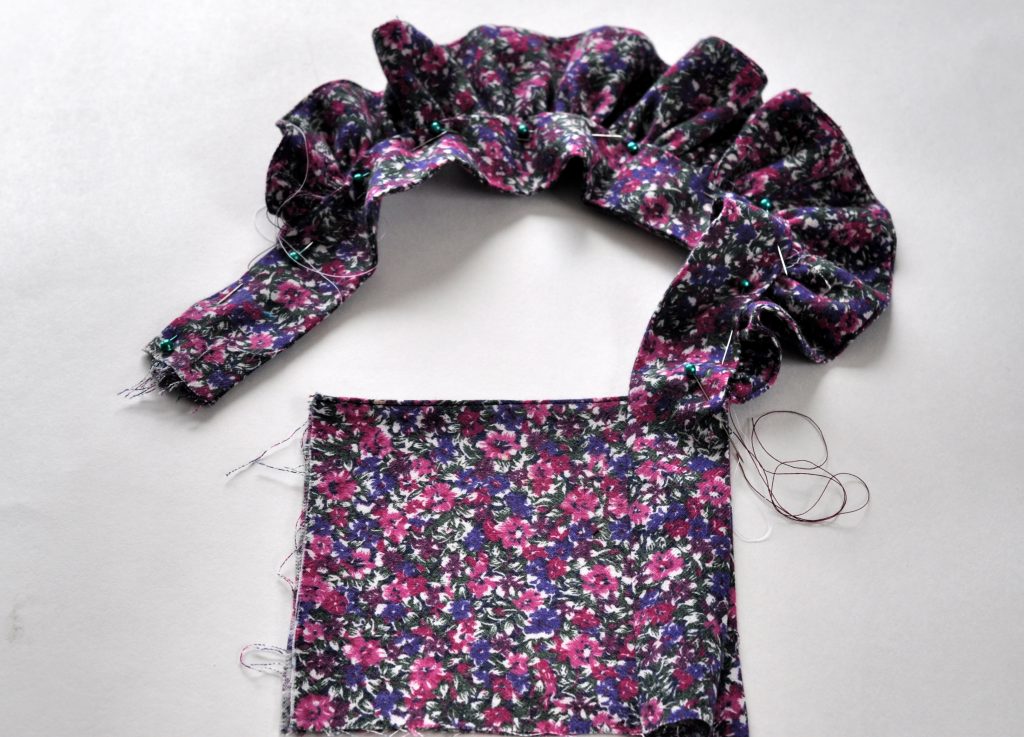
Pin the ruffle in between the two strap layers, using the straps folded under 10mm (3/8″) seam allowance as a guide.
Pin in place along the entire length of the strap, ensuring that the ruffle pieces are secure and evenly spaced.
Step 9.
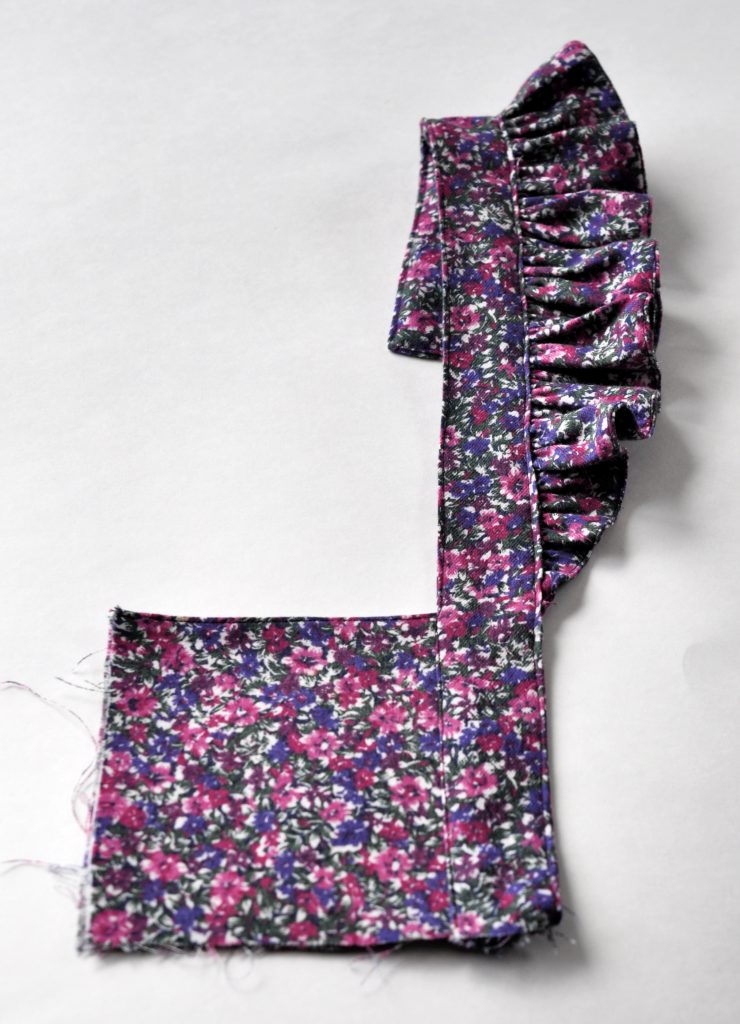
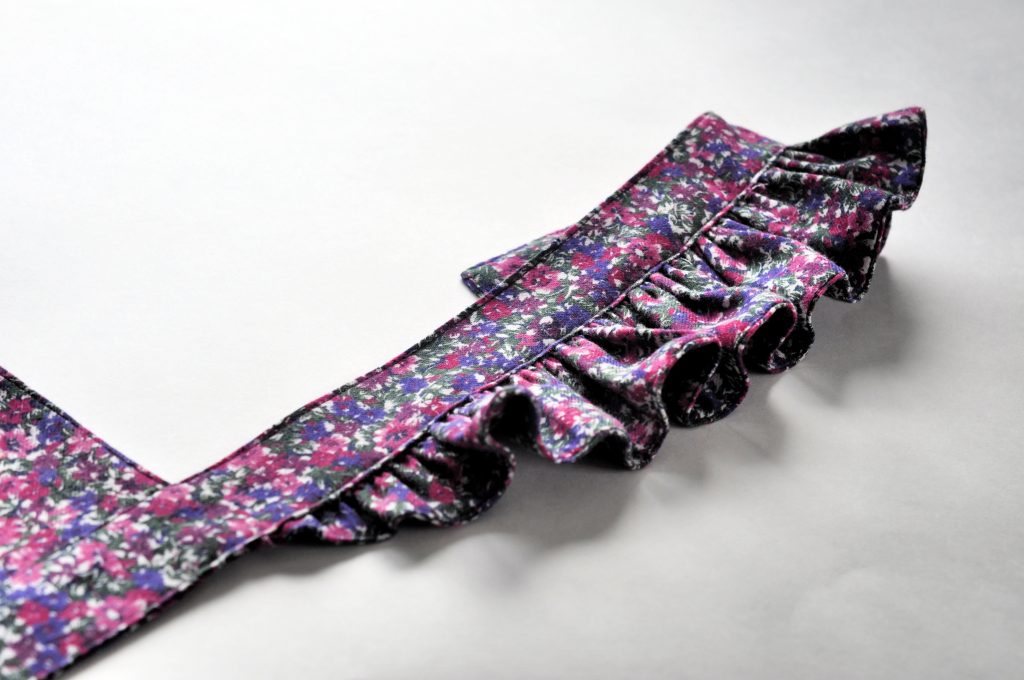
Complete step 8 of the Tui Pinafore tutorial to topstitch the straps closed, attaching the ruffle at the same time.
Step 10.
Repeat all ruffle steps for the other ruffle strap and follow all remaining Tui Pinafore Tutorial instructions to complete your Tui Pinafore.
You are finished! Congratulations!
Thanks for the Tui Pinafore ruffle tutorial Hannah! We love your adorable Tui Pinafore and can’t wait to put ruffles on everything!
Show us your Tui Pinafore ruffles in our VIP Community on Facebook or tag us on Instagram!
Love and happy sewing,
Sophie x

