You don’t need to be afraid of buttonholes any longer! Follow this tutorial to create your own beautiful buttonholes to add to your Kauri Dress, Awhi Coat or other favourite BTK makes.
Thank you to Hannah Totman for creating this tutorial for our Below The Kōwhai community.
To see more of Hannah’s beautiful sewing visit @_hannahlouise1 and @littlekinhandmade on Instagram.

Nicely sewn buttonholes can make a real difference to the overall finish of a garment.
They are essentially a series of zigzag stitches to reinforce a hole cut in your fabric for your button to pass through, but the way buttonholes are sewn varies between different makes and models of machine.
Last year I upgraded to a machine with automatic buttonholes and it quickly became my absolute favourite feature ever. Using a buttonhole foot certainly makes sewing buttonholes quicker and easier but whichever way you sew them I hope that these steps will help you toward getting a nice professional finish.
Before you begin make sure you have your sewing machine manual to hand, you will need to refer to it for specific instructions and settings to use for your machine. If you don’t have a manual you can often find/download a copy online.
1. Gather your supplies
- Your fabric (including scraps for practicing)
- Coordinating thread
- A good quality light/medium weight iron on interfacing
- Buttons
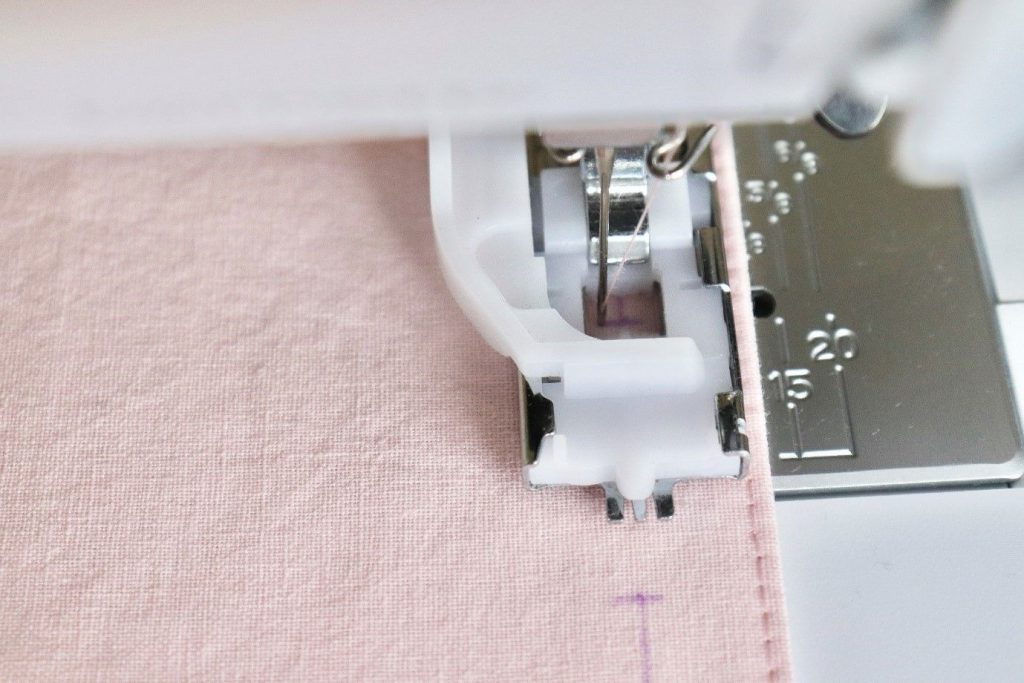
- Buttonhole foot
- Ruler
- Chalk or air erasable pen
- Sharp seam ripper or embroidery scissors
- Pins

2. Prepare your fabric
Attach your interfacing to the wrong side of your main fabric – when sewing the Kauri dress, I attach a 2cm strip of lightweight iron on interfacing all the way along the seam where the buttonholes and buttons will be placed.
Click here to watch a helpful video for attaching iron on interfacing.
I recommend always using an interfacing behind your buttonholes, even if not specified in a pattern, it will stabilise the fabric and prevent stretching and fraying.
Trim seam allowances near the buttonhole area to avoid an uneven surface for your buttonhole foot to work on.

If sewing manual or 4 Step buttonholes: Measure the diameter of your button. Add 2-3mm to each side to allow for ease (thicker buttons may need more ease). Mark your buttonholes evenly on your fabric using your chalk or air erasable pen.

For automatic buttonholes: Simply insert the button onto the back of the foot and it decides the size of the buttonhole for you. In this case you only need to mark the start point of your buttonhole on your fabric.
3. Practice!
Always sew a couple of test buttonholes on a piece of scrap fabric – include interfacing and lining to make it as ‘real’ as possible.
A test run checks that your settings are correct and also helps settle any pre-buttonhole nerves! Adjust thread tension if necessary – you shouldn’t have any bobbin thread showing on the right side of your fabric.
Open your buttonhole and check that the button passes easily through.

4. Sew your buttonhole
Carefully line up your buttonhole foot with your markings, I also use the edge of the buttonhole foot as a guide for getting everything straight. Manually lower your needle to your fabric to make sure you are starting your stiches in the correct place.

Start sewing slowly (following steps from your manual).
Allow the machine to feed the fabric through the process, do not force it as this could send your stitching off course.
5. Finish your buttonhole
Once you have finished all four sides of your buttonhole raise your presser foot and cut your threads leaving about 10cm of length. Draw them through to the wrong side of your fabric by pulling on your bobbin thread, tie them off to secure – I like this method of tying off because it leaves the from of your buttonhole looking neat and tidy.
Use a seam ripper or embroidery scissors to open buttonhole. Insert a pin horizontally at the far end of the buttonhole to stop you from accidentally cutting to far! Start at one end and cut to the middle, then turn the buttonhole and repeat from the other end. Trim any stray threads.

Corded Buttonholes
Corded Buttonholes include a few more steps than a regular buttonhole but give a really smart and durable finish. Useful for trickier fabrics and would also look great on thicker fabrics say if you wanted to add buttonholes to an Awhi Coat.
You will need a buttonhole foot and something to use as your cord (ideally the same colour as your thread). I used embroidery thread here because it is what I had to hand, but you could use nearly any type of thread.
Hook the cord over the pin at the back of your buttonhole foot and with the cord pulled tight tie the ends together through the pins at the front of the buttonhole foot.

Attach your foot and sew as normal. The zigzag stitch will form a casing over your cord, make sure you are not sewing through the cord. Remove your fabric. Gently pull the ends of the cord until the loop sits flat with the top of your buttonhole, then use a needle to thread the ends through to the wrong side of your fabric.


Tie off to secure, trim the excess cord and finish the rest of your buttonhole as above.
I sewed three buttonholes using the different techniques as a comparison.

Once all your buttonholes are completed you can position and attach your buttons!

OUR FAVOURITE EASY BUTTON SEWING PATTERNS

Thanks for the fabulous button hole tips Hannah!
We can’t wait to see how you use these tips to give your garments an extra professional finish and conquer your fear of buttonholes!
Show us know the results in our VIP Community , or tag us on Instagram @belowthekowhai !
Love and happy sewing,
Sophie x


