

Layers, print settings and troubleshooting how to print PDF Sewing Patterns!

Troubleshoot your way to print PDF sewing patterns with this handy guide! We’ll compare print settlings to actual print results and what settings you need to select for perfect results!
DOWNLOAD AND VIEW YOUR PDF SEWING PATTERNS
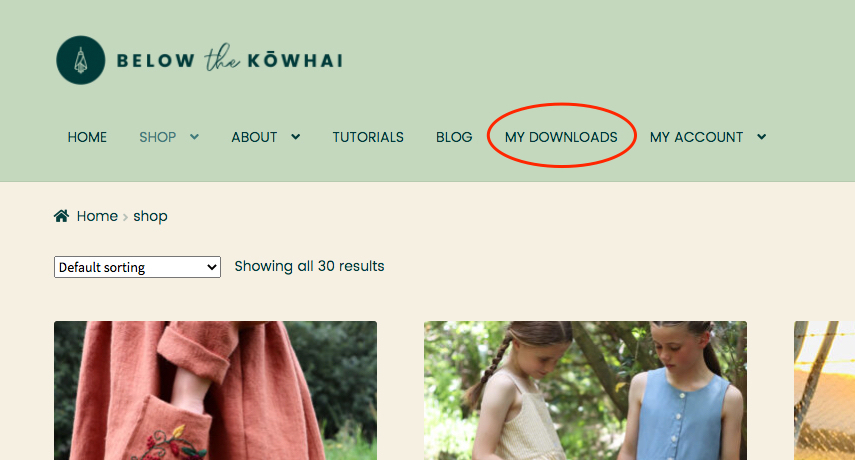
Your Below the Kōwhai PDF sewing patterns will always be available to you in My Downloads when you are logged in to our website. From time to time we update our files, so if you’re sewing in the future consider downloading your files afresh!
DO NOT open your PDF sewing patterns in your internet browser. Internet browsers can alter PDF settings, don’t even touch them! Sometimes they can take away lines, or add ones that aren’t even there. Trust.
Open your files using Adobe Acrobat Reader – download for free here (any country, language and operating system)
You can print your pattern at home on A4 or US Letter paper in black and white. Please view your tutorial on your device as you sew to save your ink and our trees!
LAYERS

Most Below the Kōwhai sewing patterns include size layers.
These are visible when accessing your sewing patterns from Adobe Acrobat Reader on a desktop / laptop.
Click on the stacked paper icon on the left and deselect any sizes you don’t want to print.
Ensure the PAGES + PRINT DETAILS remains checked.
Any size layers with the eye symbol will print, making it easier to find your size lines and cut the pattern out!
Some of our earlier patterns don’t have this function, in which case the layer symbol will not be visible.
OPTIMAL PRINT SETTINGS
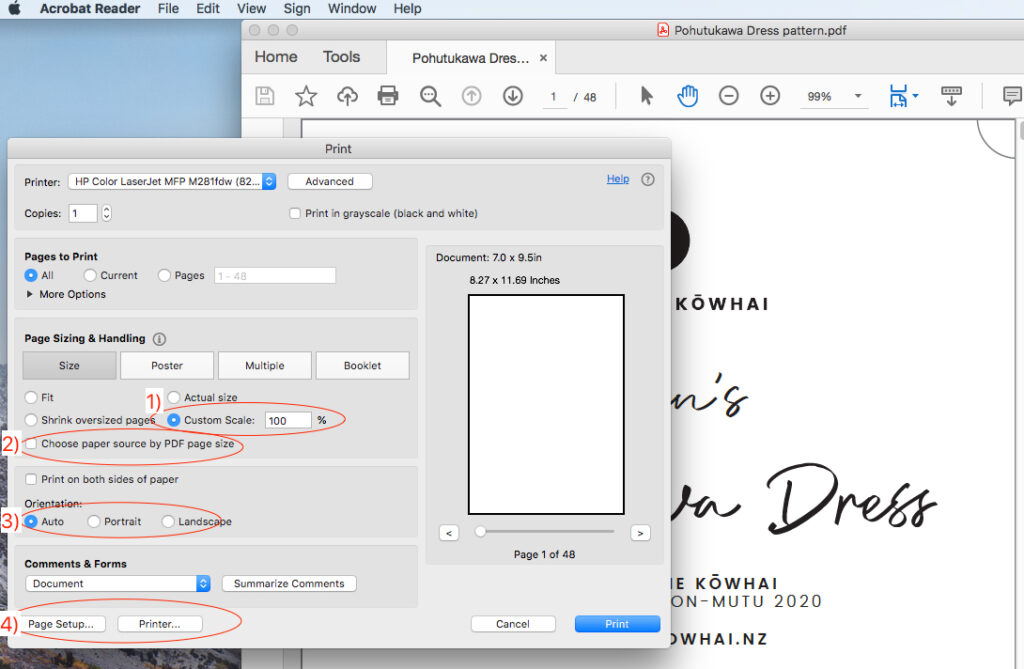
- Custom Scale: 100%
- Choose paper source by PDF page size: unchecked
- Orientation: Auto
- Page setup/printer: Your own printer settings
Below we will go through each setting and what it will look like when each is incorrectly selected.
If you are having print issues, scroll through these easy troubleshooting options to diagnose and fix your printing symptoms!
Note: Your print settings might look different and/or not have all of these features.
TEST SQUARE
Always print Page 1 first to check the print box test square measures exactly. Use a ruler! Tape measures can stretch overtime and give you an incorrect measurement.
1) CUSTOM SCALE: 100%
Always print your PDF sewing patterns to 100% scale (as shown above).
This is the most important detail to tell someone if they are printing on your behalf!
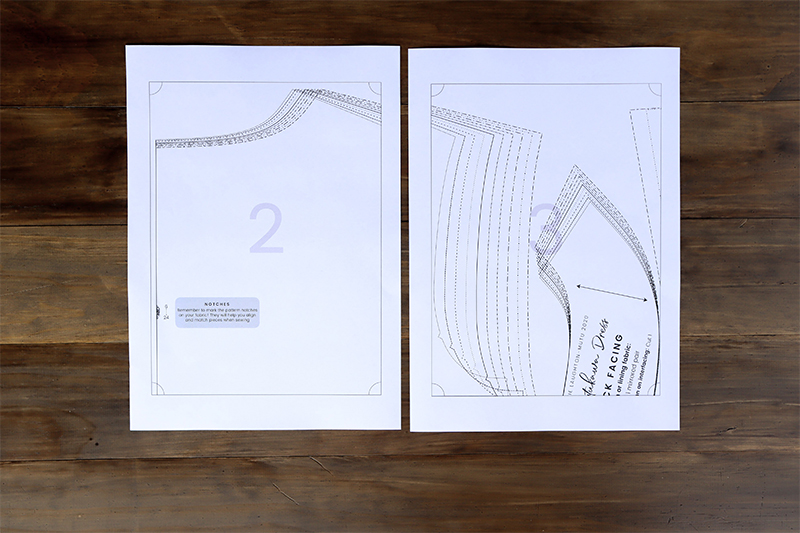
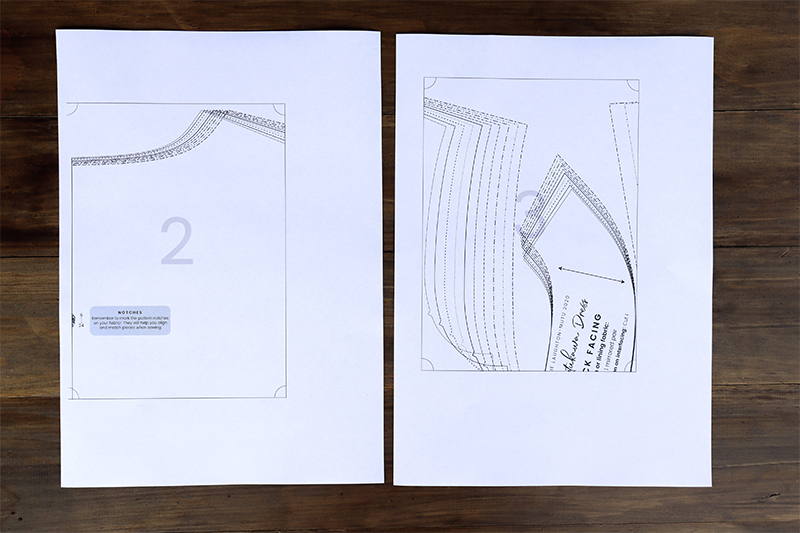
When printed correctly, there should be a printing bounding box on each page, with quarter circles in each corner that aligns with another page. Some pages wont have circles, that’s because it’s the end of a row that doesn’t connect with another page.

Shown above is an example of when the pattern is printed to “fit to page”. The bounding boxes take up the whole page, causing the print test square to be larger by 3mm (1/8″). This will make all the difference in the final garment and should be avoided!
2) CHOOSE PAPER SOURCE BY PDF SIZE: UNCHECKED
Shown is what happens when the PDF Source by Paper Size is checked. Aside from Scale: 100%, this is the most common printing error that reaches my inbox for help.
Pattern tiling is off the page, cutting off parts of the pattern.
Pattern tiling can also be squashed, causing the quarter circles to appear more like rugby balls when aligned.
Ensure your Paper Source by PDF size is unchecked.
3) ORIENTATION: AUTO


Shown is what happens when the orientation is set to either portrait (left), or landscape (right).
The print tiling falls off the side of the page and is pressed hard against the top left corner, and edges of bounding boxes are often missing.
Remember, patterns should have a full printed bounding box and be mostly centred on your page.
The Orientation should always be set to auto.
3) PAGE SETUP / PRINTER
You might have more settings here to configure. Namely, selecting the name of your printer and paper size. Always use your printer name instead of letting the computer decide!
READY TO PRINT!
Check:
- Is your test square measuring accurately
- Do you have all bounding box edges mostly centred on the page
- Are the circles in the corners appearing as quarters (and not rugby balls / cut off)
You’re ready to print and cut out your pattern!
Continue here for a guide to assembling your PDF sewing pattern…
GOT MORE QUESTIONS?
Check out our FAQ, then email me on hello@belowthekowhai.nz or jump into the VIP facebook community to ask any questions.